

SSL certificates are crucial to gaining trust from new visitors who land on your website. If you’re hosted with a decent hosting provider you can install a free SSL certificate on WordPress.
This post contains affiliate links. If you buy through these links I will get a small commission at no extra cost to you. I only recommend products that I use and love or products that I want to try.
In this tutorial I’ll take you through the steps of installing a free SSL certificate on Lyrical Host but the process is very similar across all hosts who include a SSL certificate as part of their packages.
Estimated reading time: 5 minutes
Why do I need an SSL certificate?
Most people only really realise when a SSL certificate isn’t there on a website. An SSL certificate is what puts the little padlock in the address bar on a browser and adds the s to the https of a website URL.
It makes sure that visitors to your site have an encrypted connection so that any personal info submitted to the site can’t be intercepted.
If it’s not there browsers make a big song and dance about the site you’re viewing potentially not being secure.
Never enter payment details or personal information on a site that doesn’t have one.
Search engines like Google and Bing favour websites with SSL certificates in their search rankings. It will be virtually impossible to make the first page of results for any keyword search without an SSL certificate.
How do you get a SSL certificate?
SSL certificates are usually added to a WordPress website via the hosting provider. Most hosting providers include a free SSL certificate as part of their hosting packages.
If you’re hosted with a budget hosting provider like GoDaddy or Names.co.uk you may be charged extra for an SSL certificate which can cost anywhere upwards of £75. Usually once you’ve paid for the certificate is automatically notifies the tech team to set up one for you, so you won’t need to install it yourself. If you’re not sure about the process get in touch with your hosting provider and ask them.
How to install a free SSL certificate on WordPress using Lyrical Host
1. Go to Service Overview
I’ll be demonstrating the process using Lyrical Host but the process for most hosts will be similar.
2. Click on SSL/TLS
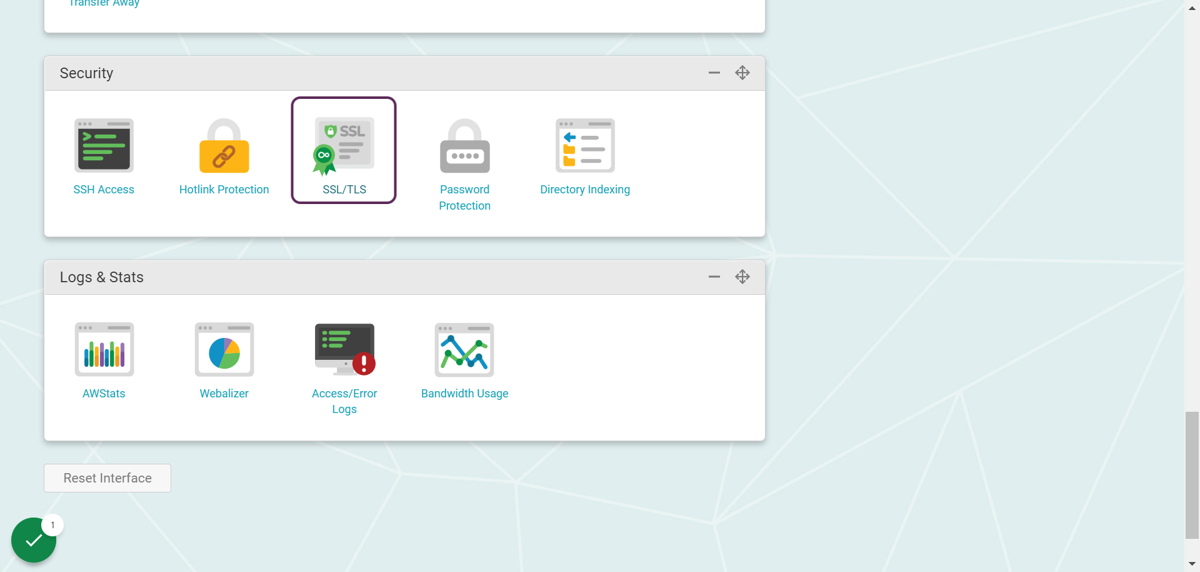
3. Click on Activate Free SSL
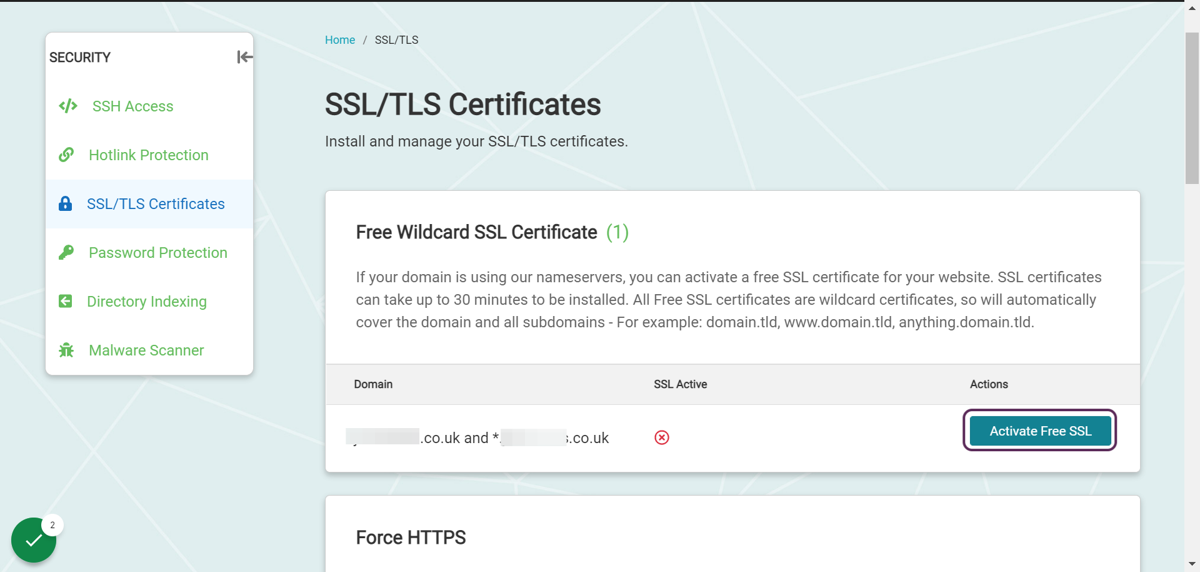
4. Enable force HTTPS
This is so that whether or not your visitors type https into the browser they’ll always be redirected to the secure version.
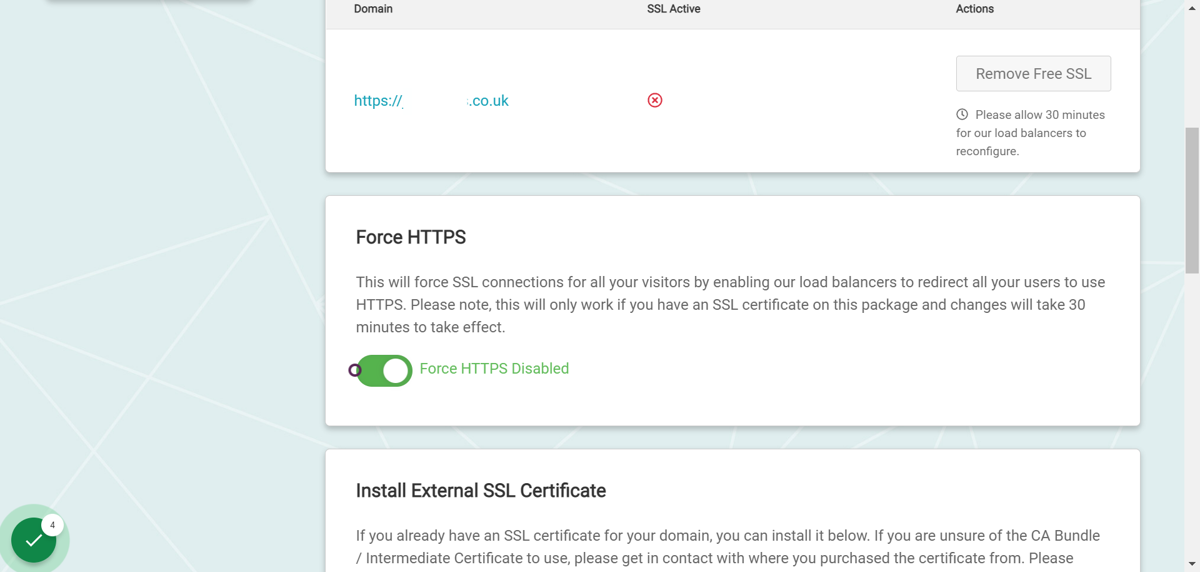
5. Go to the WordPress dashboard
6. Hover over settings and click on General
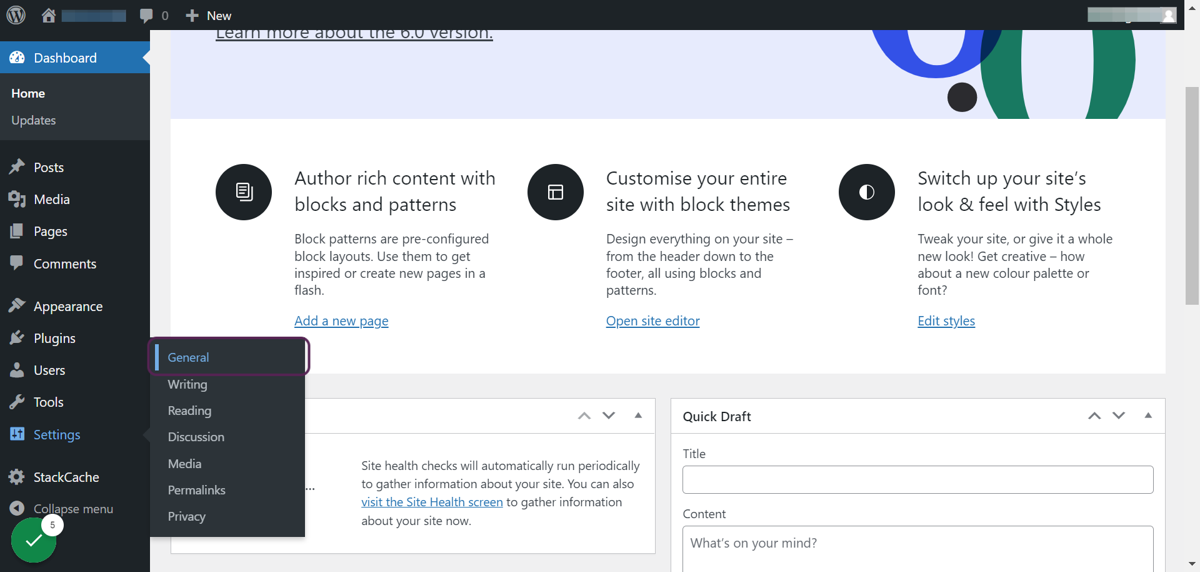
7. Add an ‘s’ after http in the WordPress Address (URL) field.
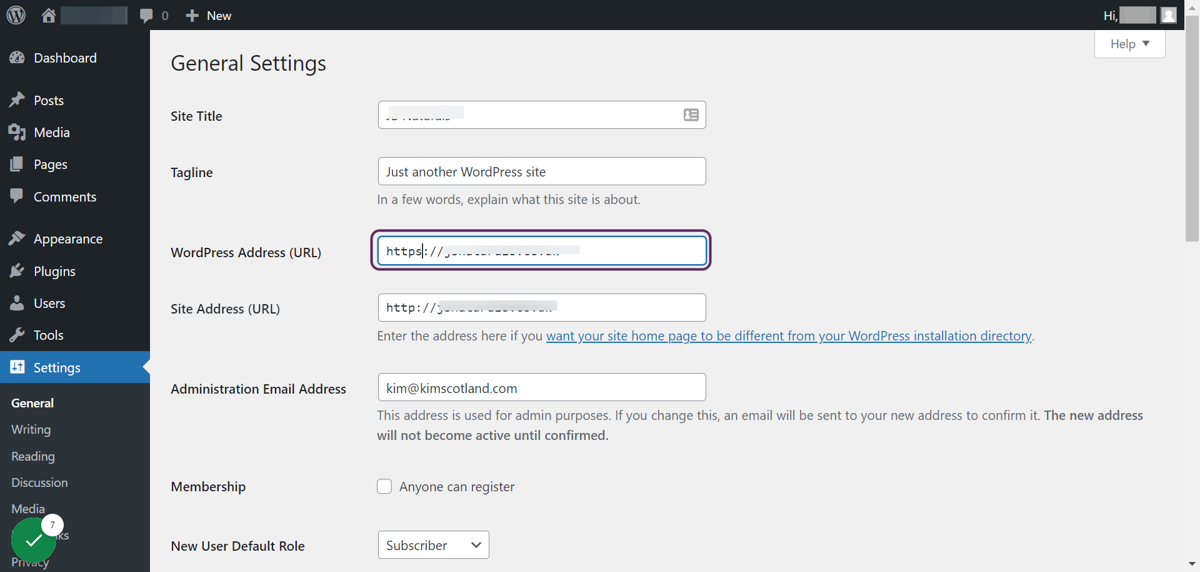
8. Add an ‘s’ after http in the Site Address (URL) field.
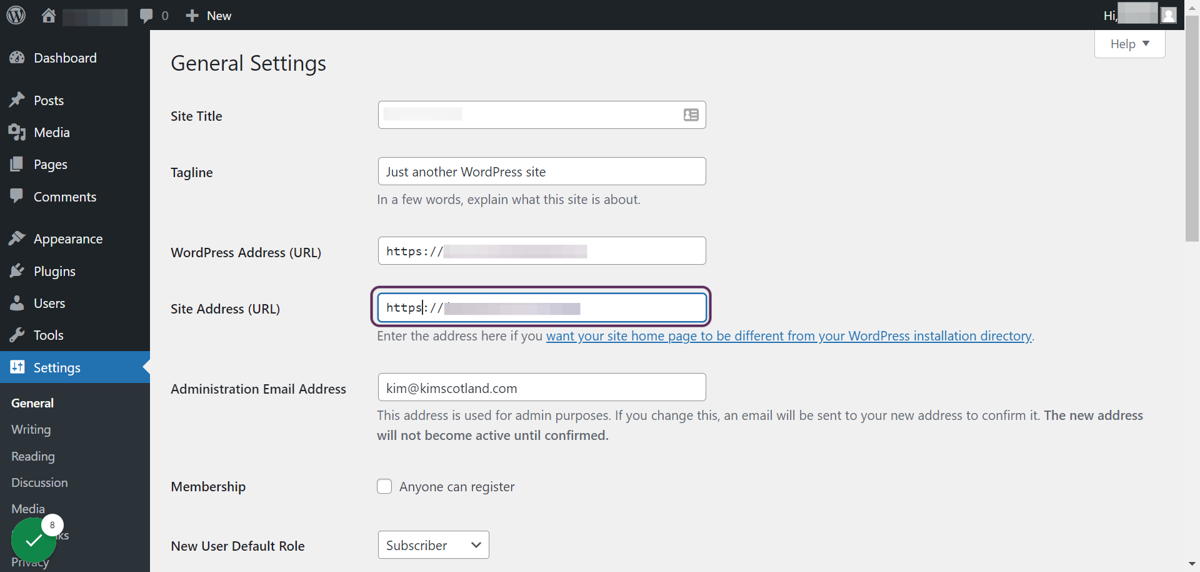
9. Click on Save Changes
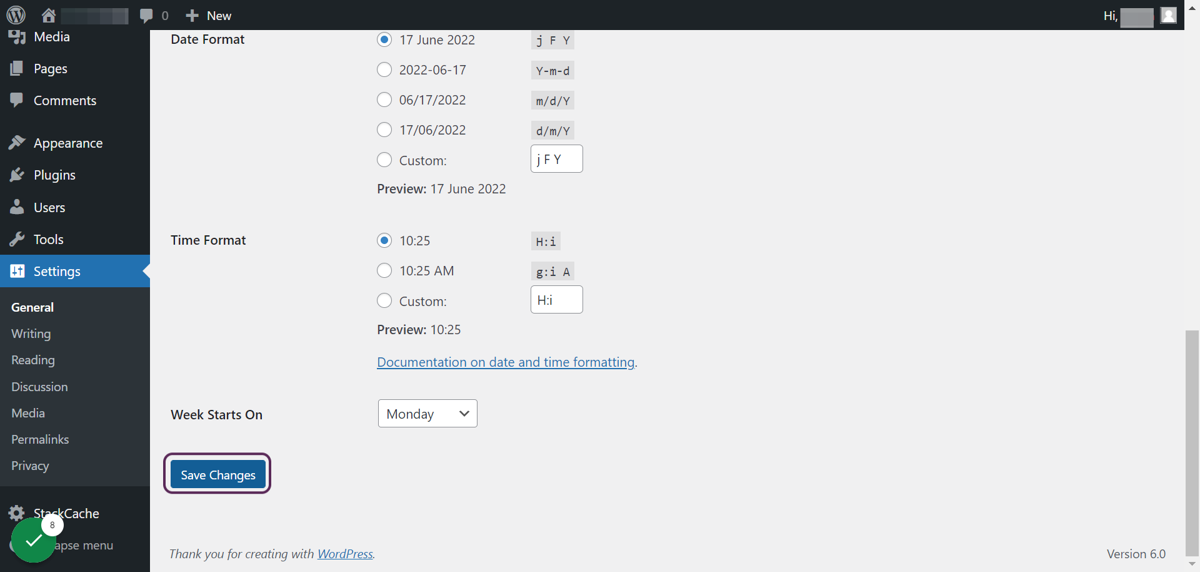
10. This will log you out of the WordPress dashboard.
11. Log back in.
Ignore any warnings that the site is insecure. It can take up to 24 hours for a security certificate to become live. Once it’s live the warnings will disappear so visitors will feel secure on your site.
How to Install a free SSL certificate on WordPress Summary
- SSL certificates add https to your URL which adds a padlock to the address bar when someone lands on your website.
- Browsers warn visitors when one doesn’t exist and search engines penalise websites without them
- You can add these to your site via your website host.
- Most WordPress hosting packages include a SSL certificate, but some budget hosts charge extra.
- To install a free SSL certificate on WordPress using Lyrical Host check out the instructions here


You may also enjoy
Best WordPress hosting for beginners