

If you’re looking to create an email list and website for your business MailerLite and Elementor are great choices.
MailerLite gives you all the essential email marketing functionality across all it’s plans and is easy for beginners to use. Elementor lets you create professional looking websites without writing a single line of code.
Together they are a solid combination for all business owners who need both an email list and website. Read on to find out how to get them working together.
This post contains affiliate links. If you buy through these links I will get a small commission at no extra cost to you. I only recommend products that I use and love or products that I want to try.
Estimated reading time: 14 minutes
Table of contents
What is MailerLite?
MailerLite is an email marketing platform for small business owners and bloggers.
Email marketing platforms allow you to create sign up forms and landing pages to collect email addresses. You can then send them email newsletters and even several automated emails if they fit certain criteria.
MailerLite is my preferred platform and is the one I always recommend. This is because it’s intuitive and easy to use for beginners and those with bigger email lists and because it doesn’t hide what I consider to be essential email marketing features behind a paywall.
What is Elementor
Elementor is a WordPress drag and drop page builder plugin. It lets you create professional looking websites by dragging the different elements onto your web pages into rows and columns.
You can then customise those elements with your brand colours, fonts and content. It’s a great tool for non-tech people as well as people like myself who use it to build websites and templates for clients.
How to grow an email list
Email lists are incredibly important to any business. They offer you a consistent way of connecting with your subscribers every time you send them an email.
As long as you’re not considered a spam sender by spam filters, a very high percentage of emails (usually 90%+) will land in their inboxes whenever you email them.
At the very least, to start and grow an email list you’ll need an email marketing platform such as MailerLite to create sign up forms and store your subscriber information.
If you have a website, it’s a good idea to add your sign up forms to your website for brand continuity.
Always check your relevant laws on what you need to do to protect your subscriber data and the policies you need to have available for potential subscribers to read before they join your list.
How to connect Mailerlite and Elementor
There are 2 different ways to connect MailerLite and Elementor, either by copying and pasting code OR using a plugin.
Before you start trying to hook up MailerLite and Elementor, you’ll first need to create a form within MailerLite and create a landing page in Elementor.
Once you’ve done that use one of the methods below to add it to your WordPress website via Elementor.
Using a plugin
This is the best method for beginners who are nervous about copying code.
In this example I will be using a form that I’ve already created on MailerLite. You can create forms via the plugin, but your styling options will be limited, so I recommend you do it this way.
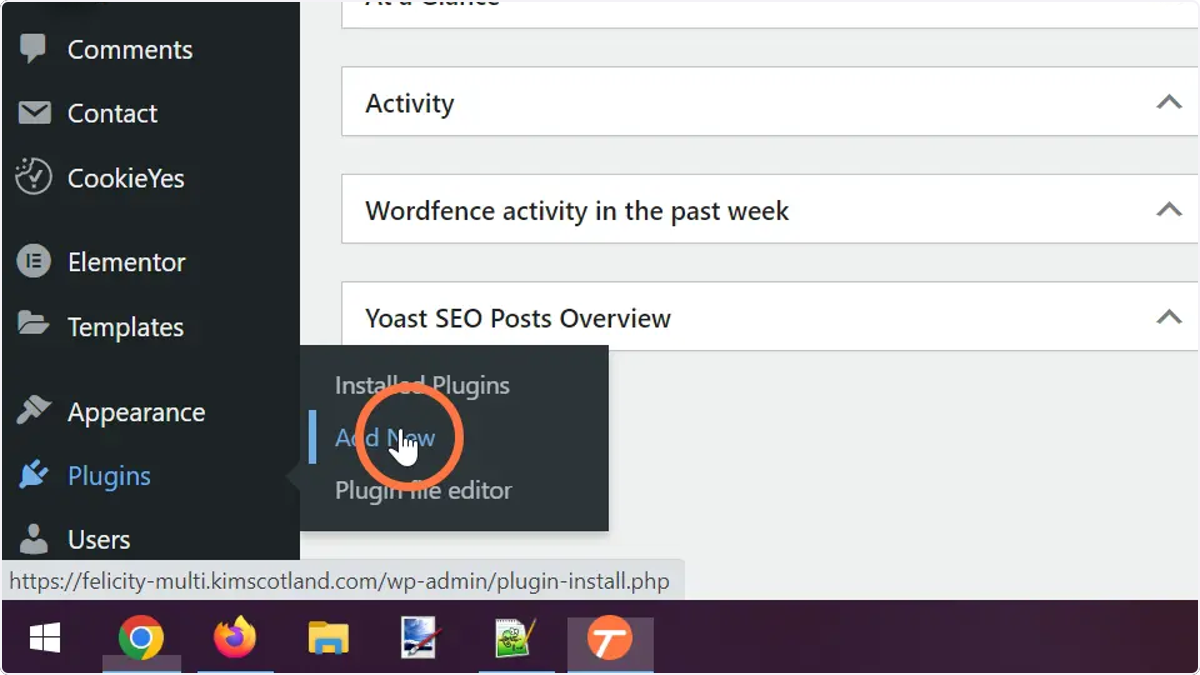
- Install the MailerLite plugin. Hover over Plugins in the main menu and click Add New.

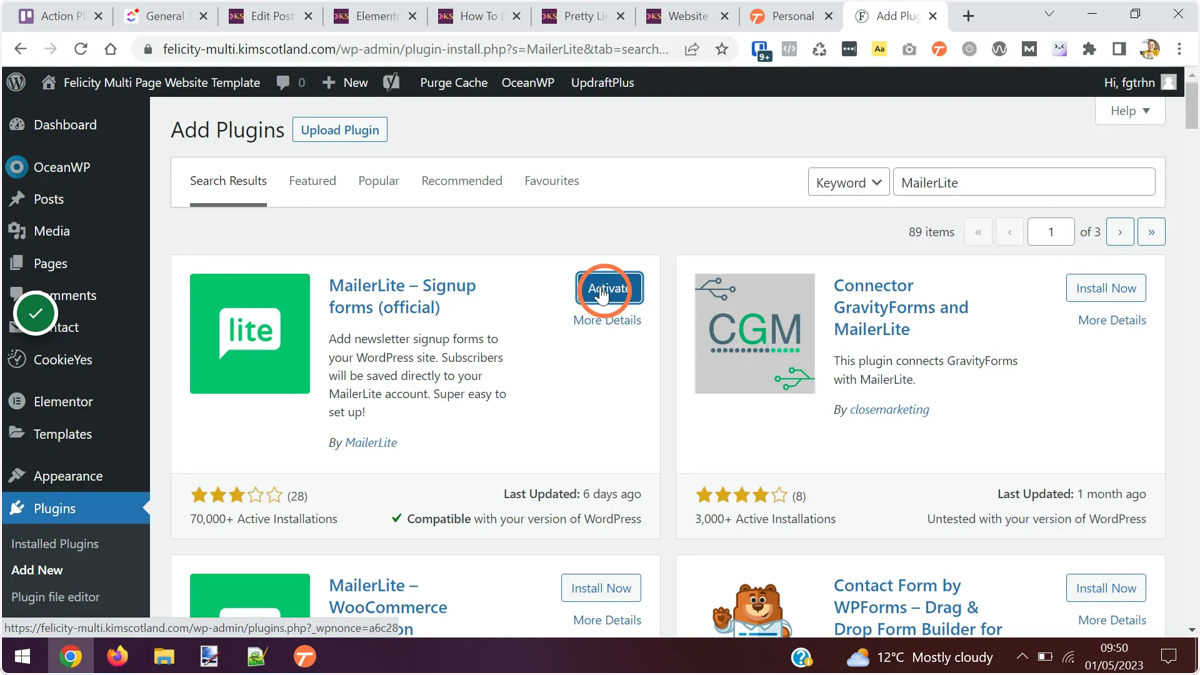
- Search for MailerLite.
- Click Install and Activate on the MailerLite – Signup forms (official) plugin.
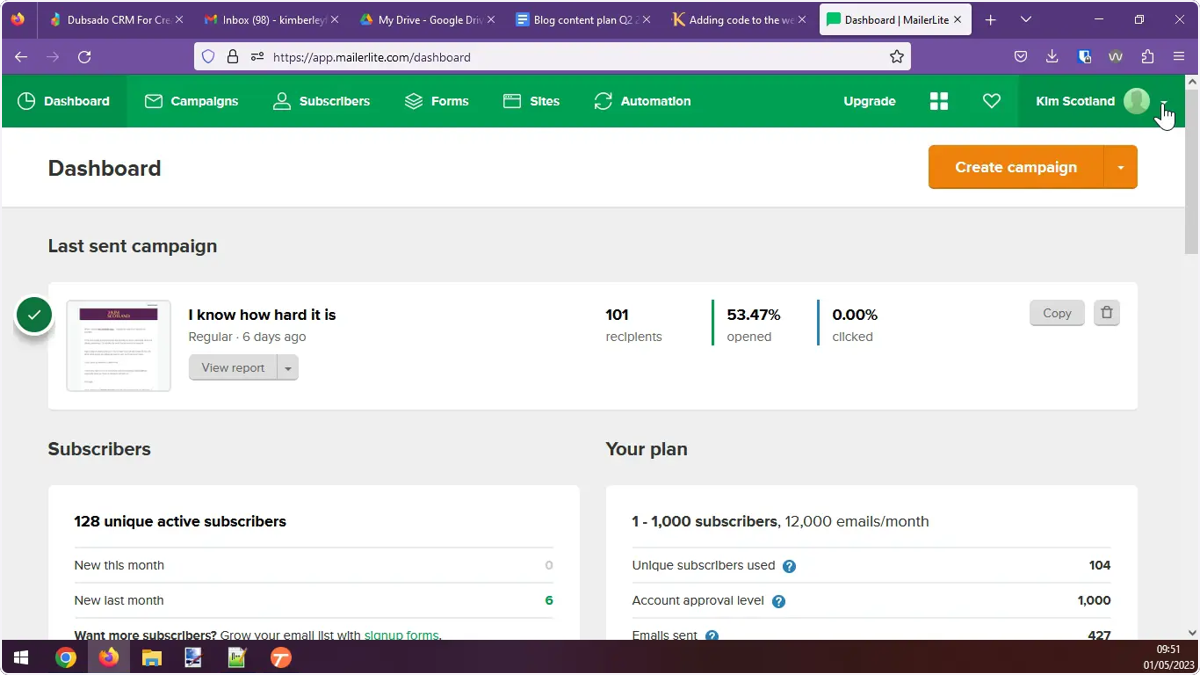
- Go into MailerLite and and click the drop down button next to your account name.
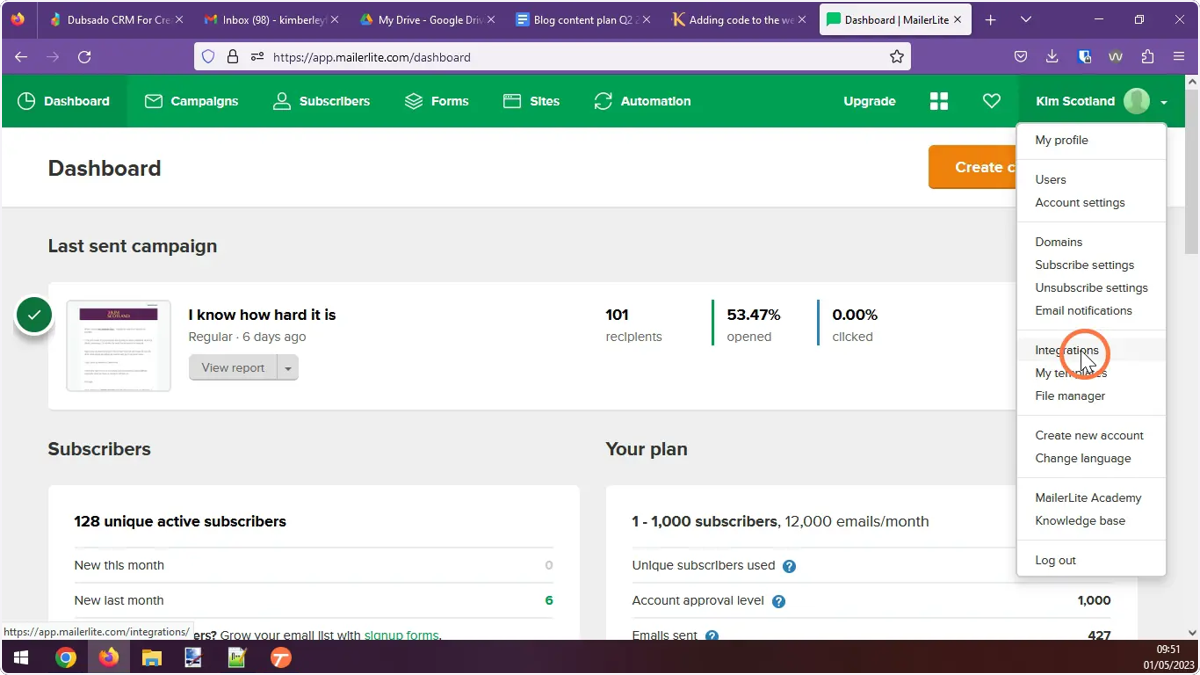
- Click Integrations.
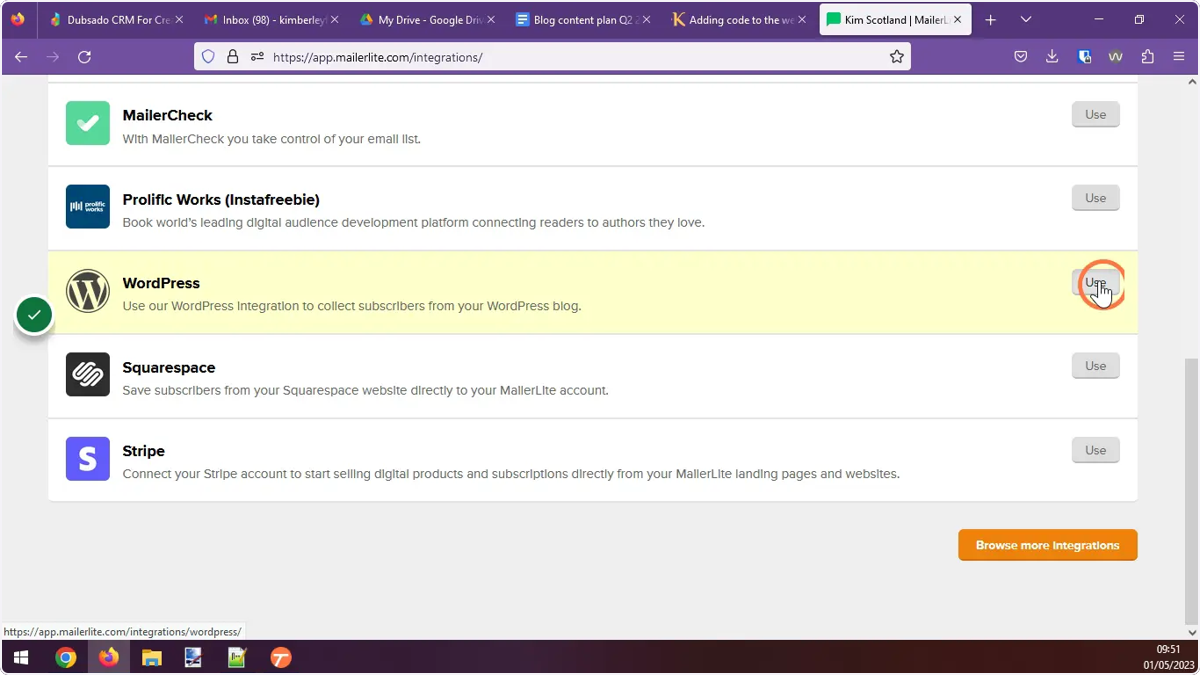
- Click the Use button opposite WordPress.
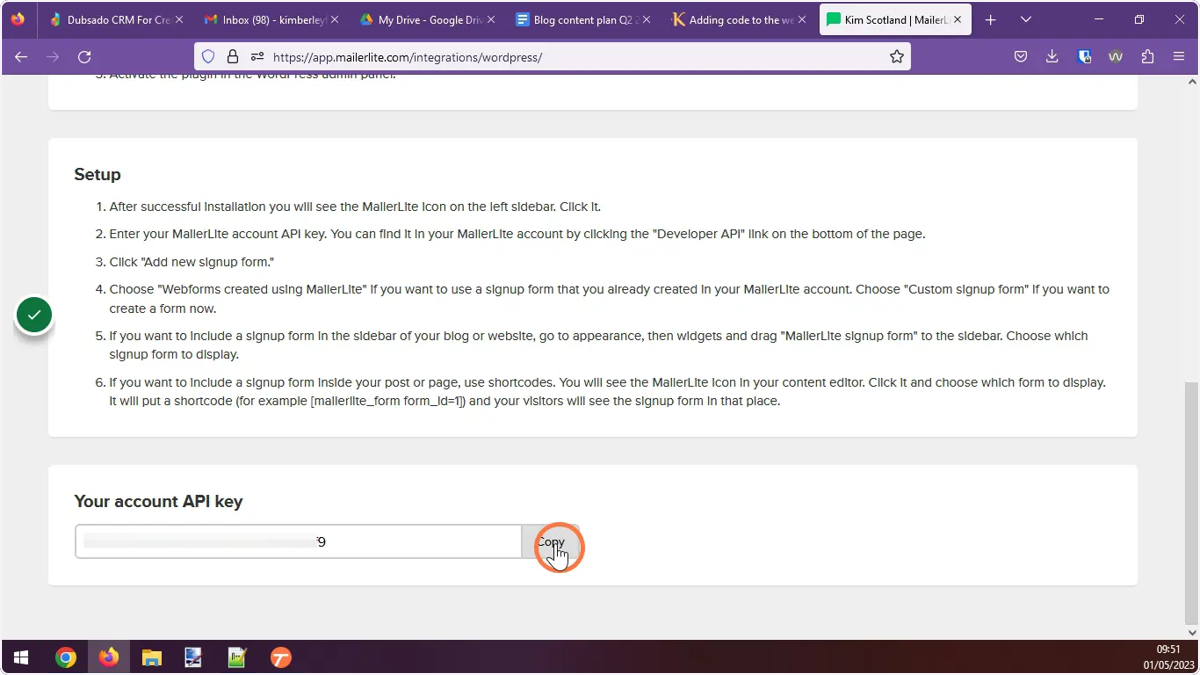
- Scroll down to your account API key and click the copy button.
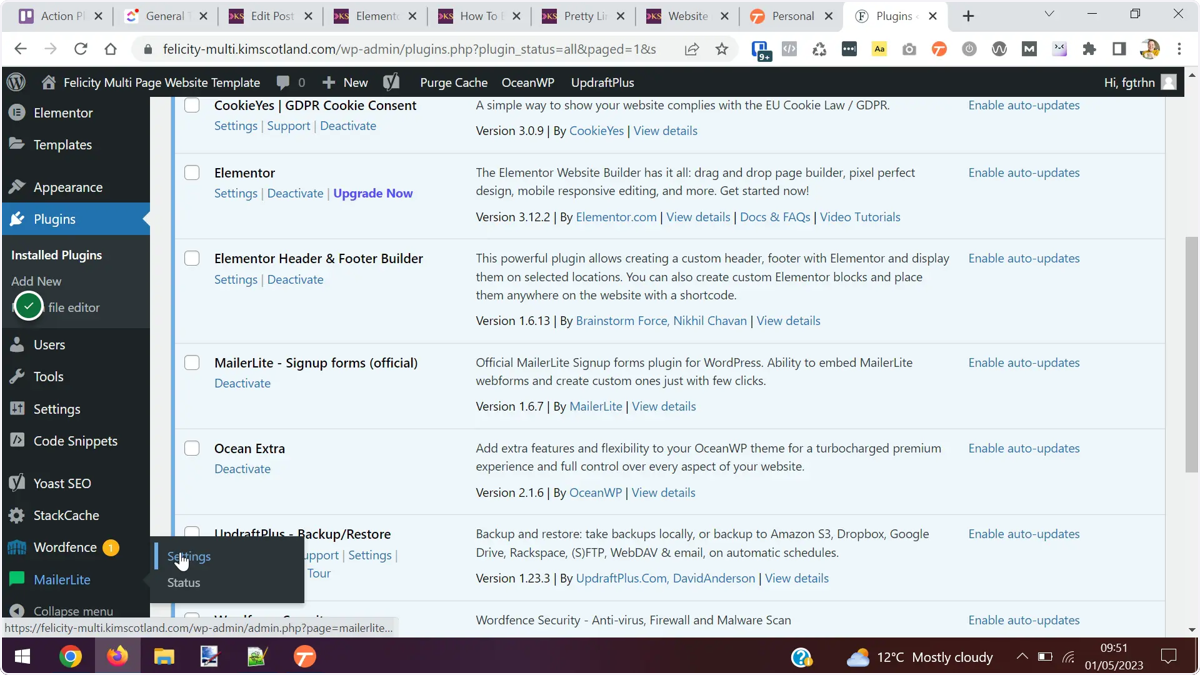
- Go back to your website. Hover over the MailerLite option in the main menu and click Settings.
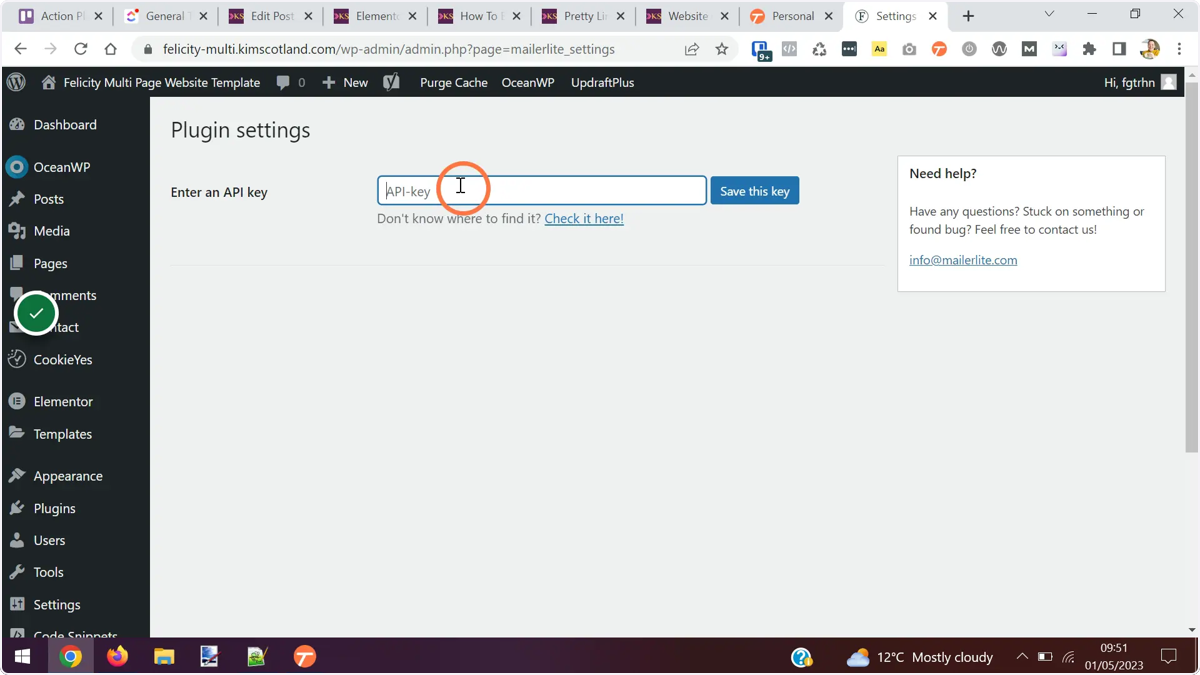
- Paste your API key into the Enter an API key text box and click the Save this key button.
- In the main menu, below MailerLite, click the Signup forms option.
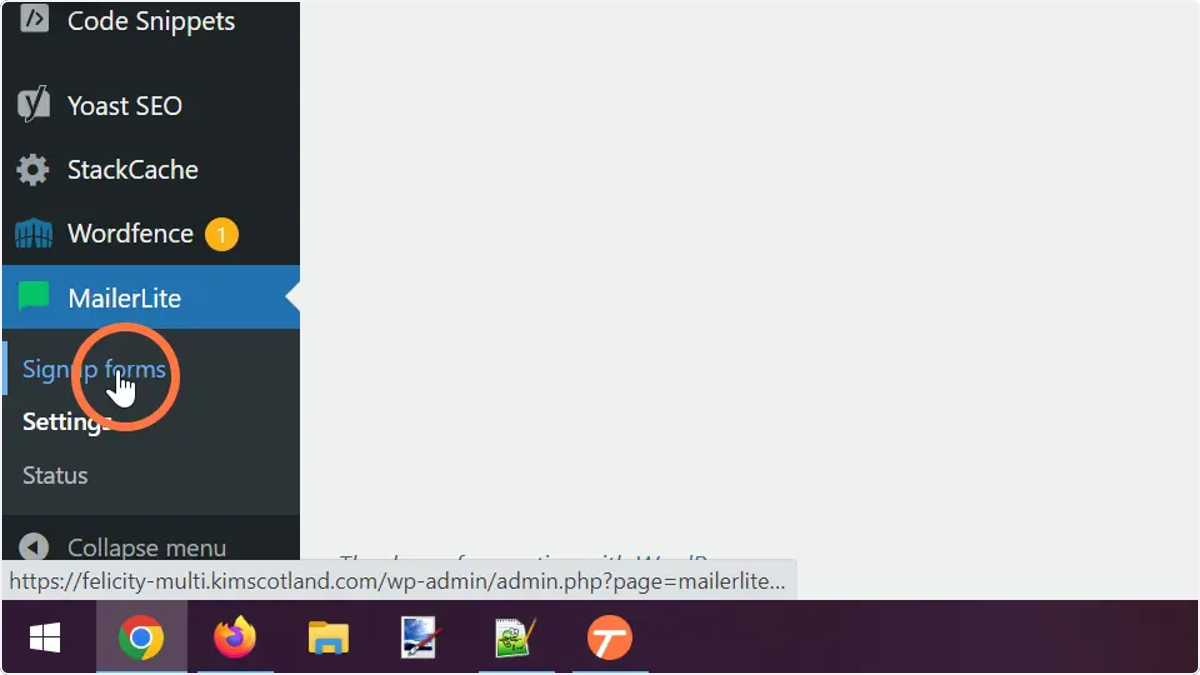
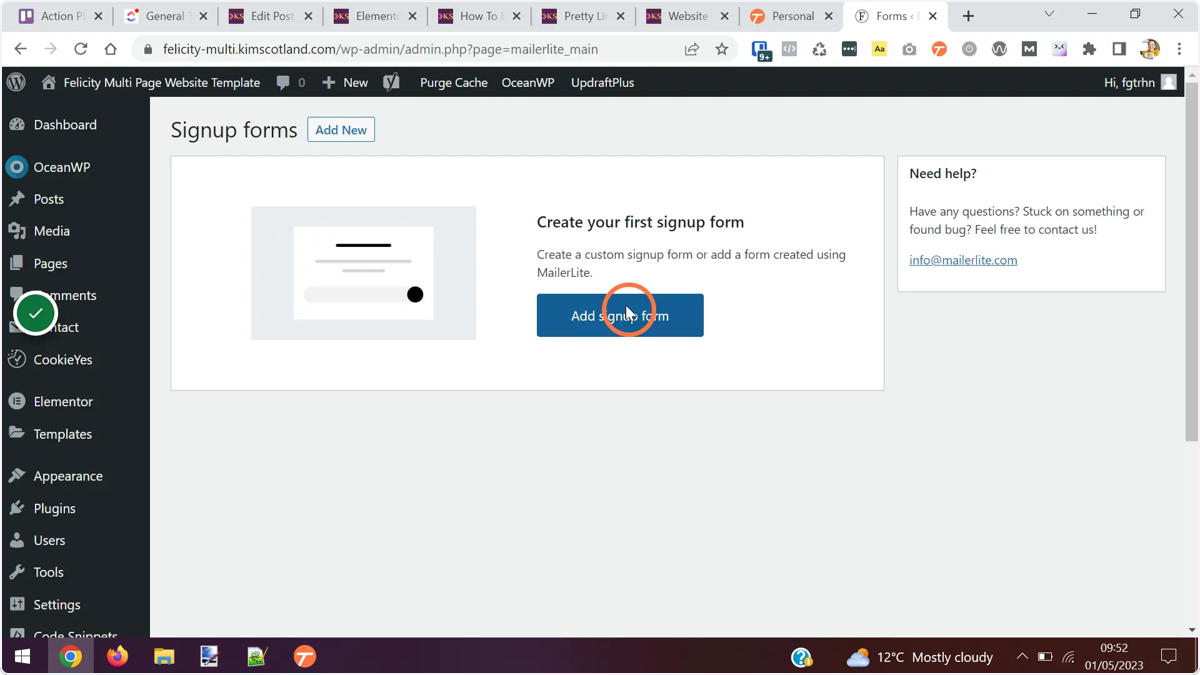
- Click the Add signup form button.
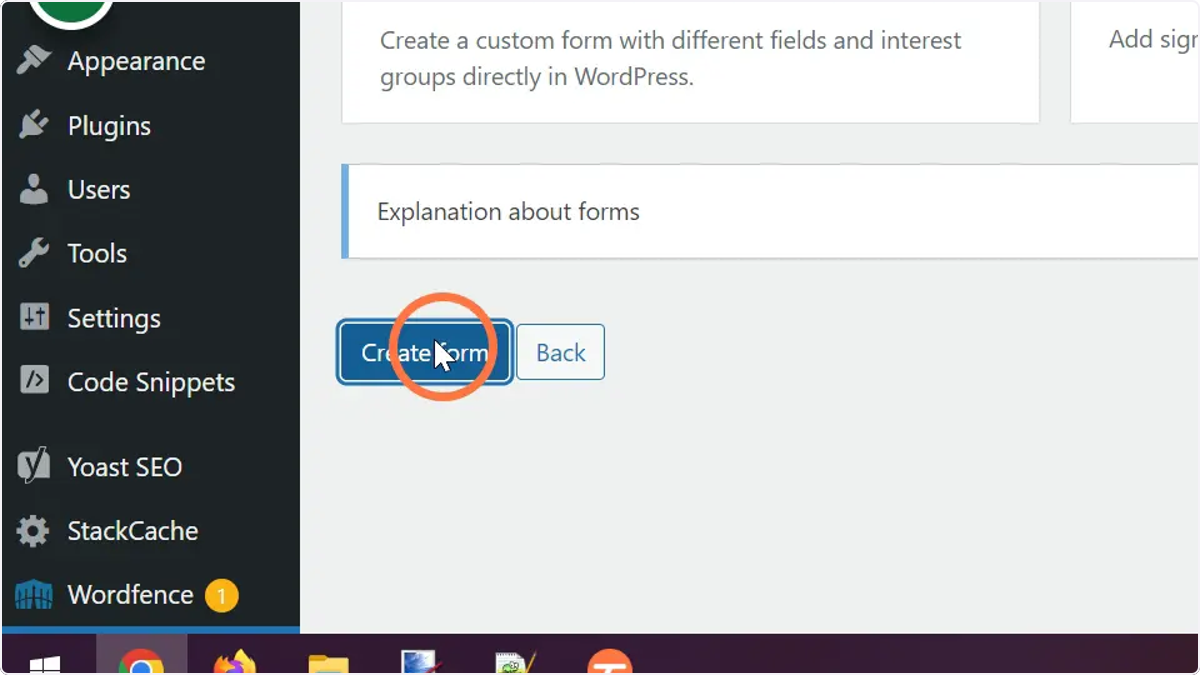
- Click the Forms created in MailerLite option.

- Click the Create form button.
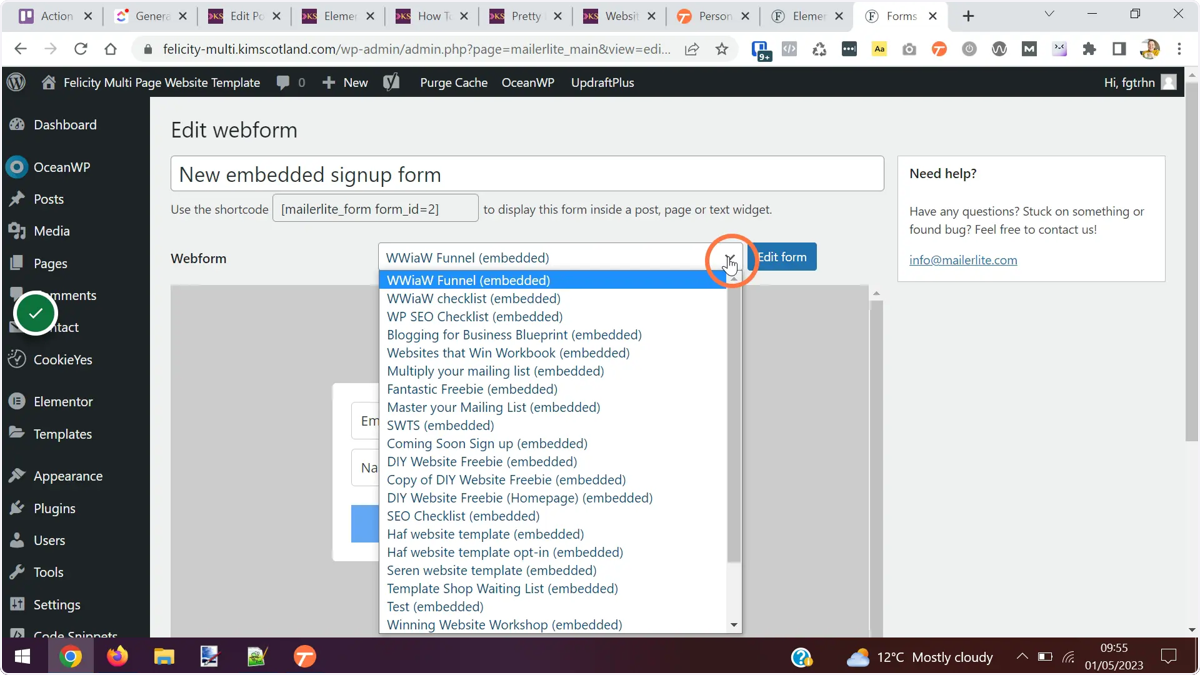
- Choose your form from the Webform dropdown list.
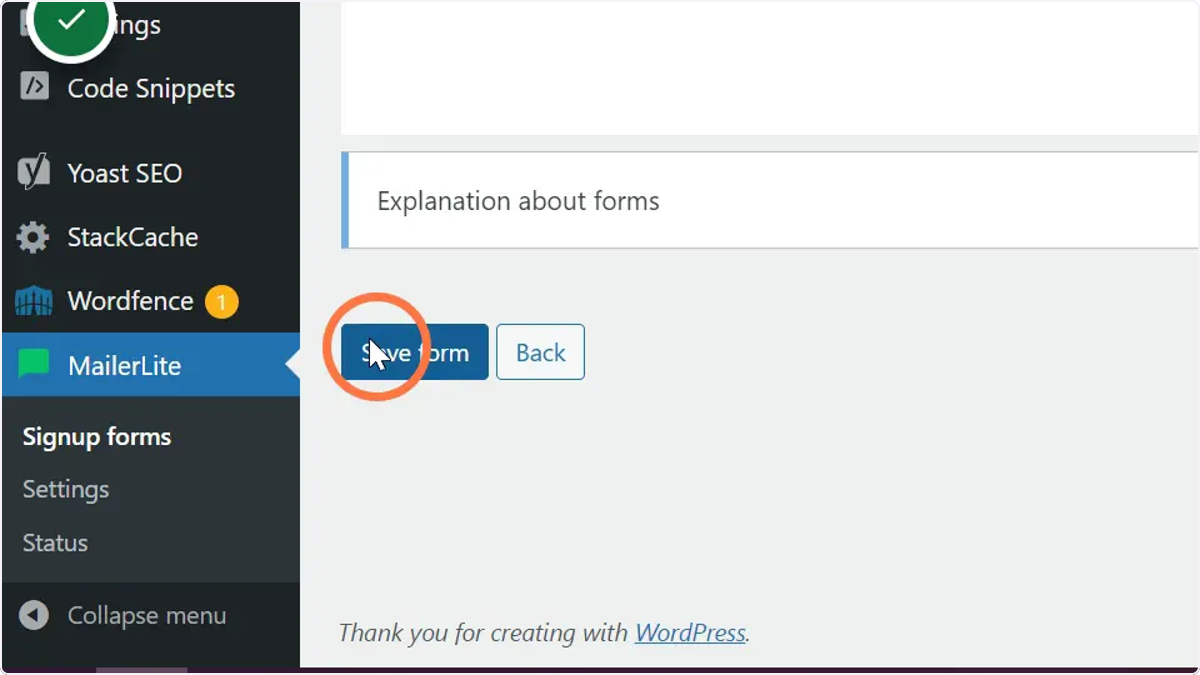
- Give it a descriptive name, then click the Save Form button.
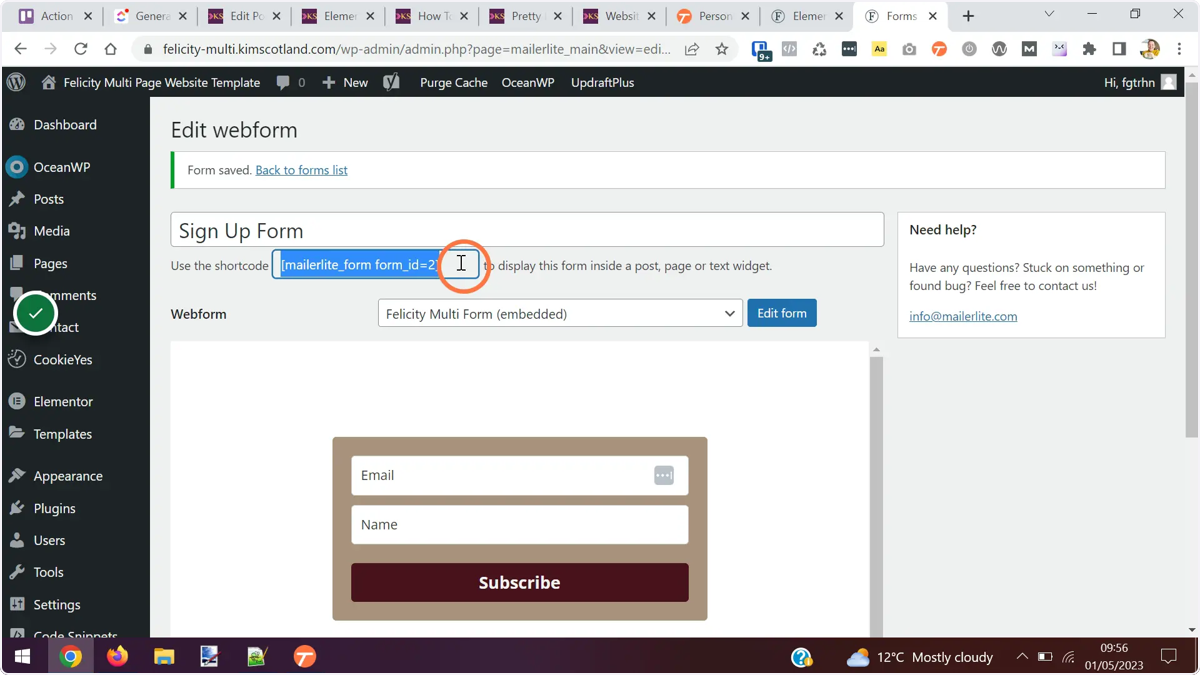
- Click on the Use this shortcode textbox. The code will be highlighted, right click and select Copy.
- Go to your page. Hover over Pages in the main menu and click All pages.
- Hover over your page and click the Edit with Elementor link.
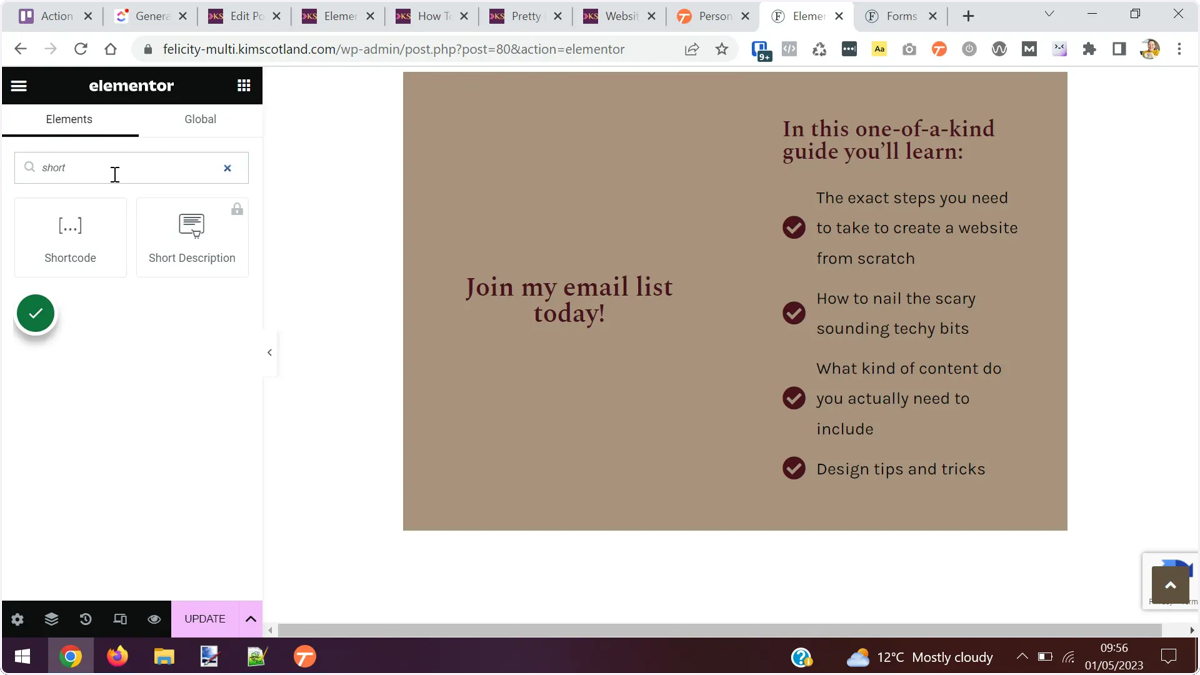
- Search for Shortcode in the Elementor options panel.
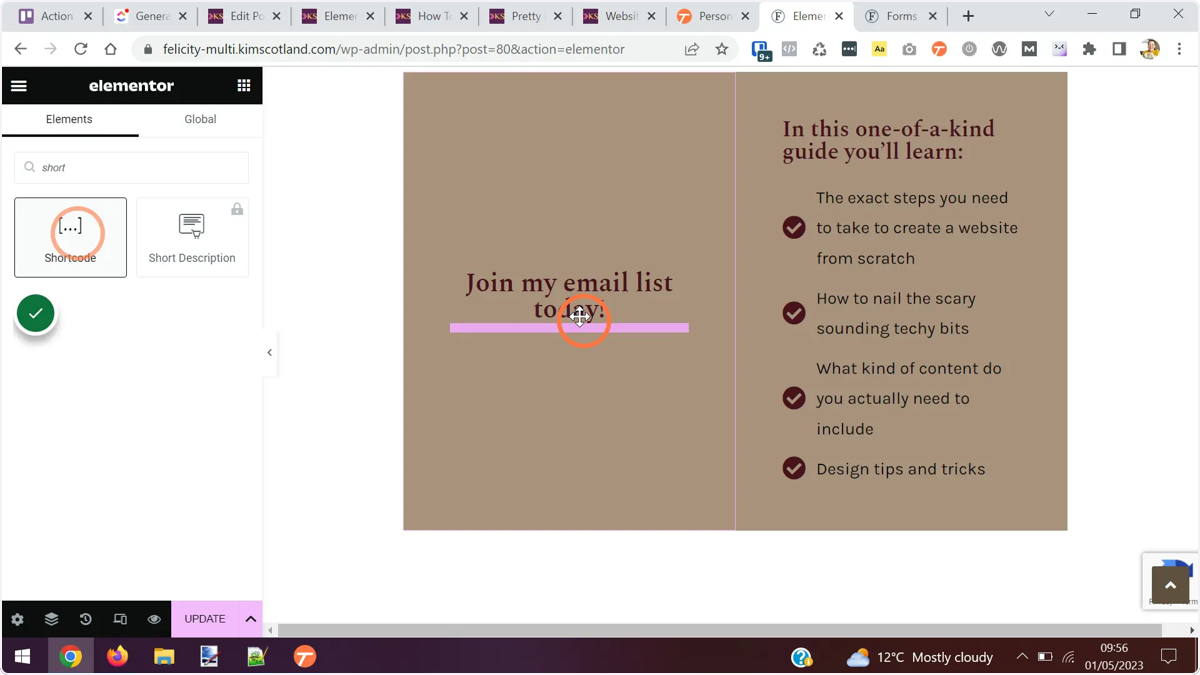
- Drag it onto the screen where you want the form to be displayed.
- Paste your shortcode into the options panel then click the Apply button. The form won’t display within Elementor, you’ll need to preview the changes to see how your form looks on your page.
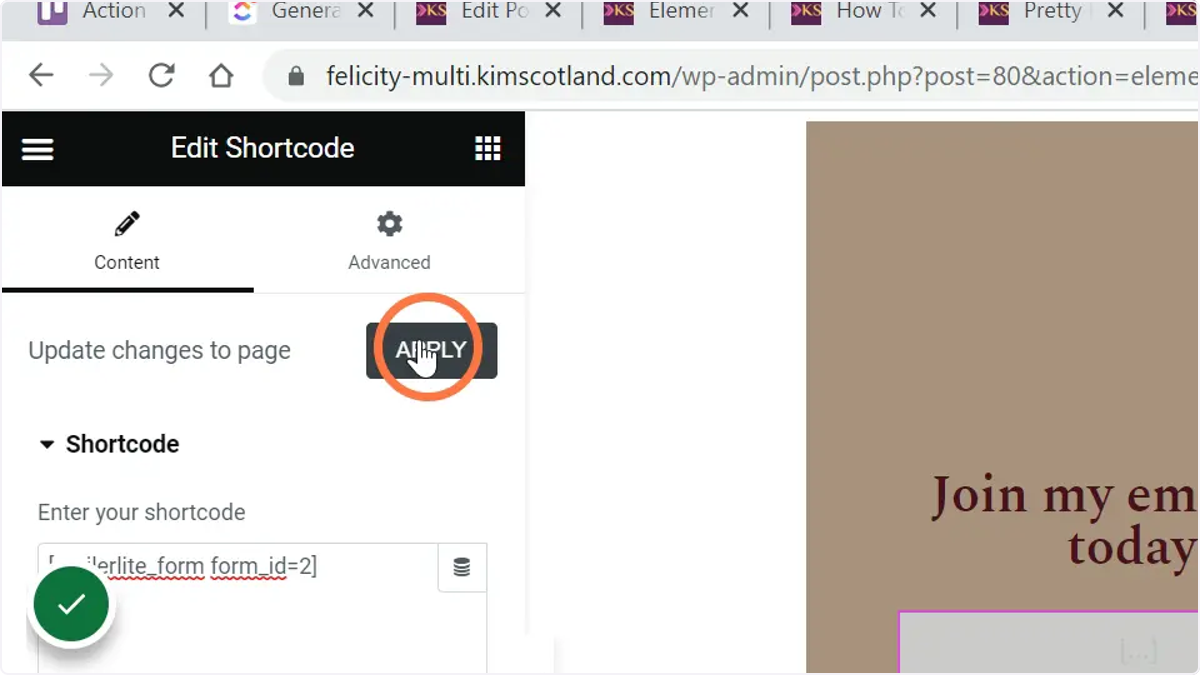
- Save your changes. Depending on whether or not you’ve already published the page you’ll have different options here. Either save the draft, publish the page or update it.
- Click the Preview Changes button.

- Your page will be displayed in a new tab with your new form.
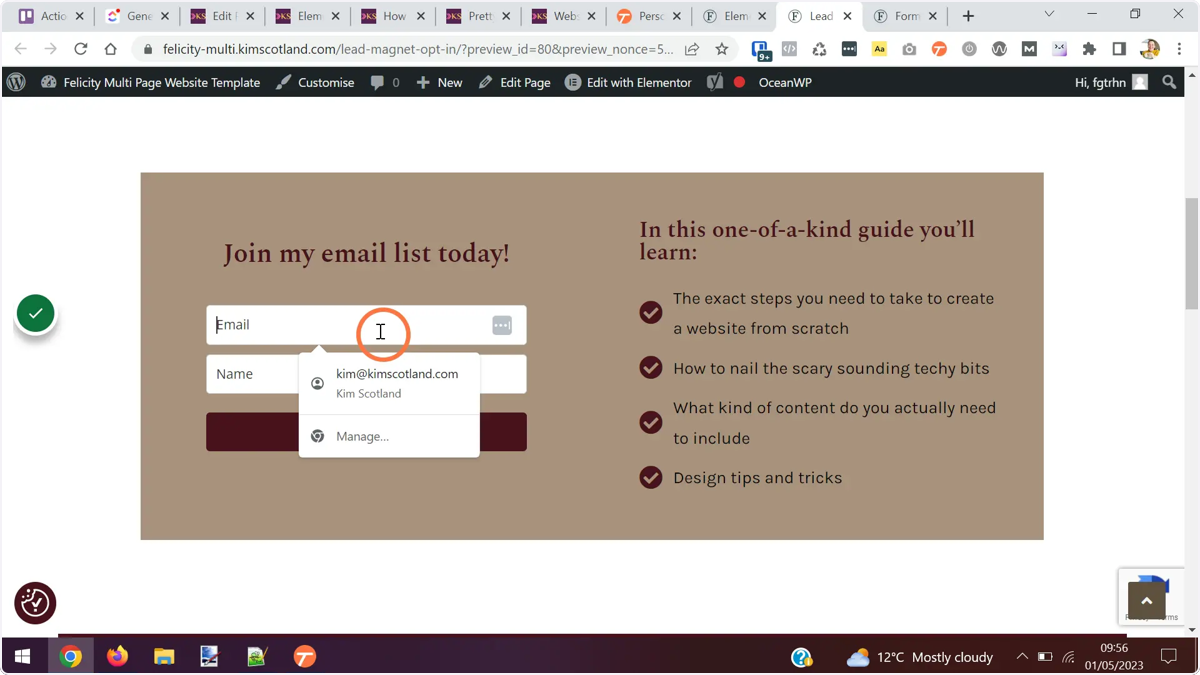
Copying and pasting code
This is my preferred method because it means I don’t have to install another plugin on my site. I probably use more plugins than most people so anytime I can avoid using one, I will.
This has 2 main stages. Adding code to the website header (this is done only the first time you connect MailerLite to your website) and then adding the code to the page you want the form to be displayed on.
MailerLite Header Code
Before you can add your form code to your pages you’ll need to add some code to your website header. I recommend you do this with a plugin. You can edit the theme header file directly, but adds additional complexity that I’m not going to go into in this article.
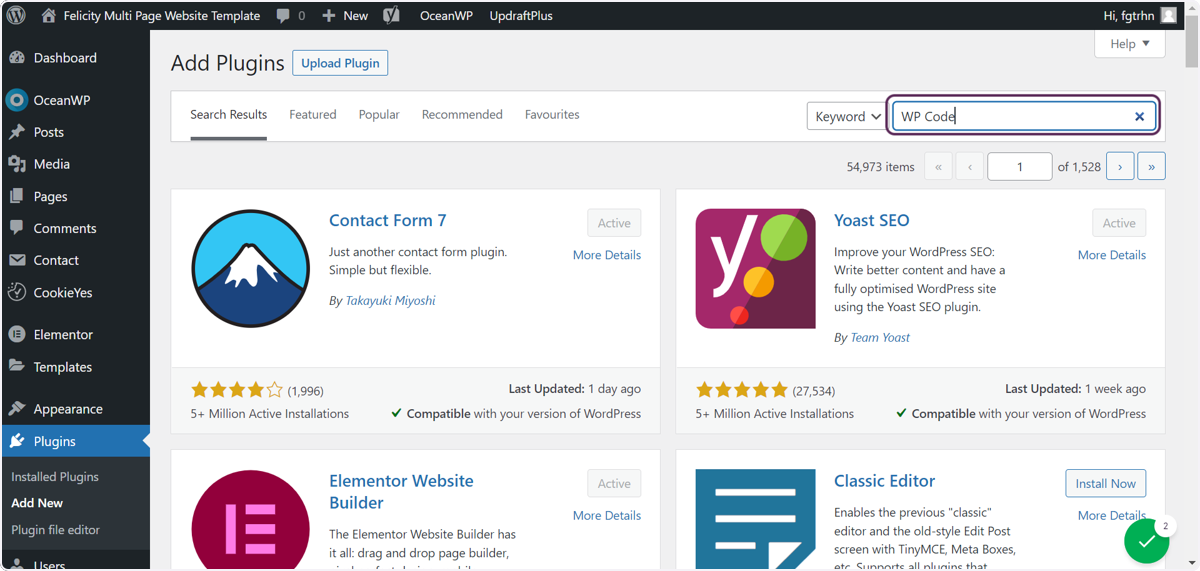
- Hover over the Plugins option and click Add Plugins
- Type “WP Code” into the search text box.
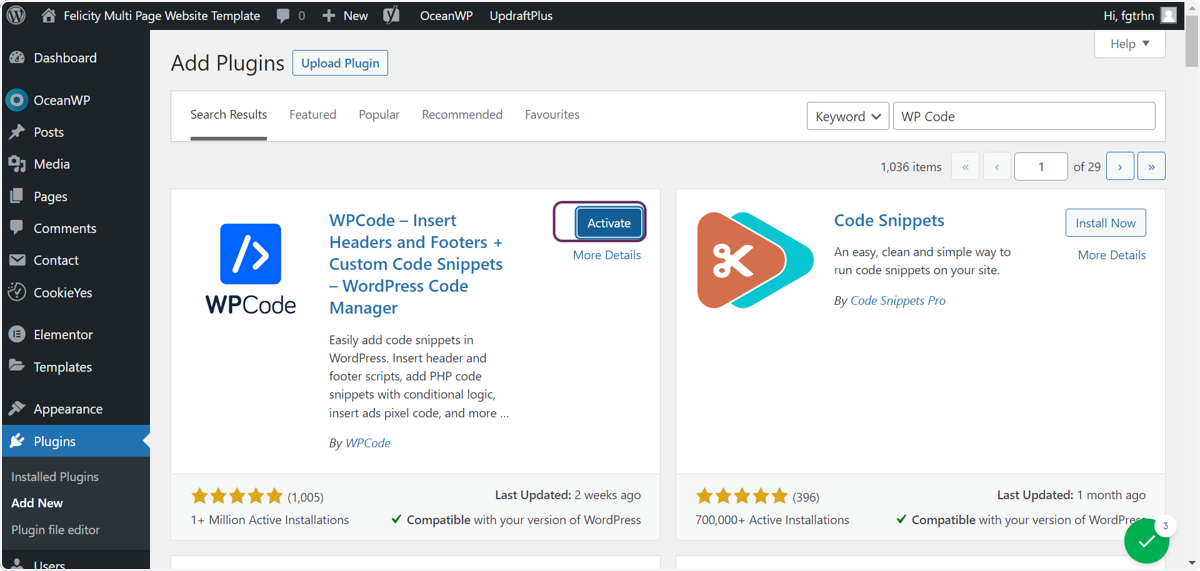
- Click on the Activate button for the result titled: ‘WPCode – Insert Headers and Footers + Custom Code Snippets – WordPress Code Manager’.
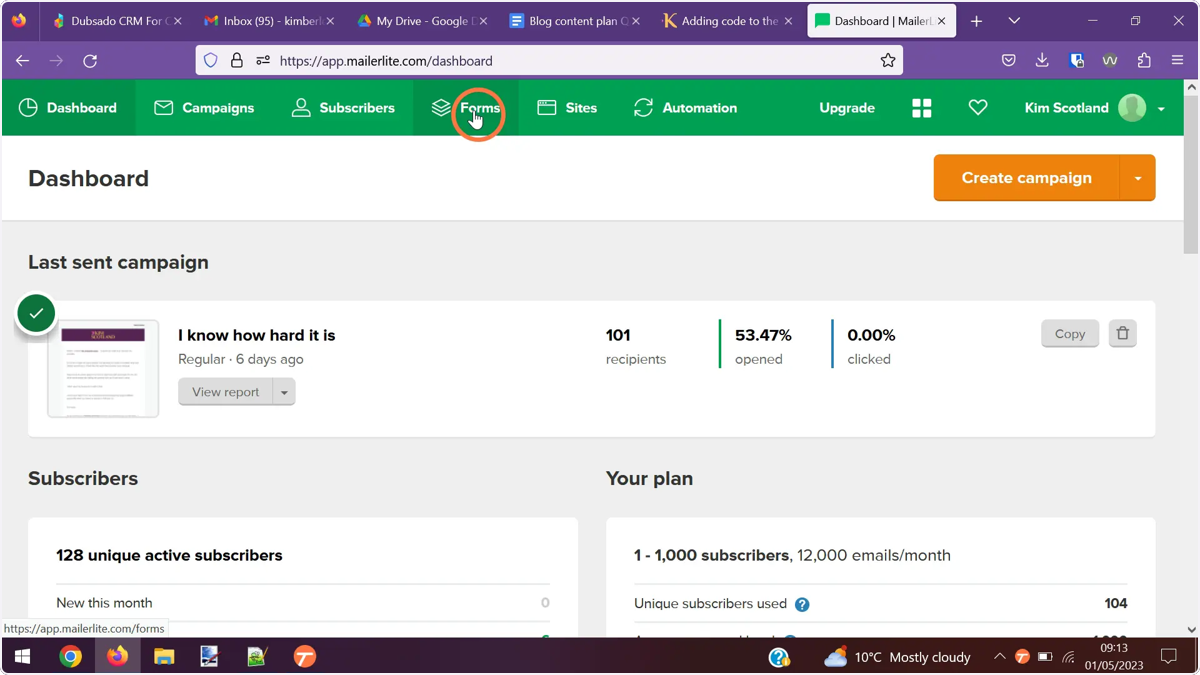
- Login to MailerLite and click the Forms tab.
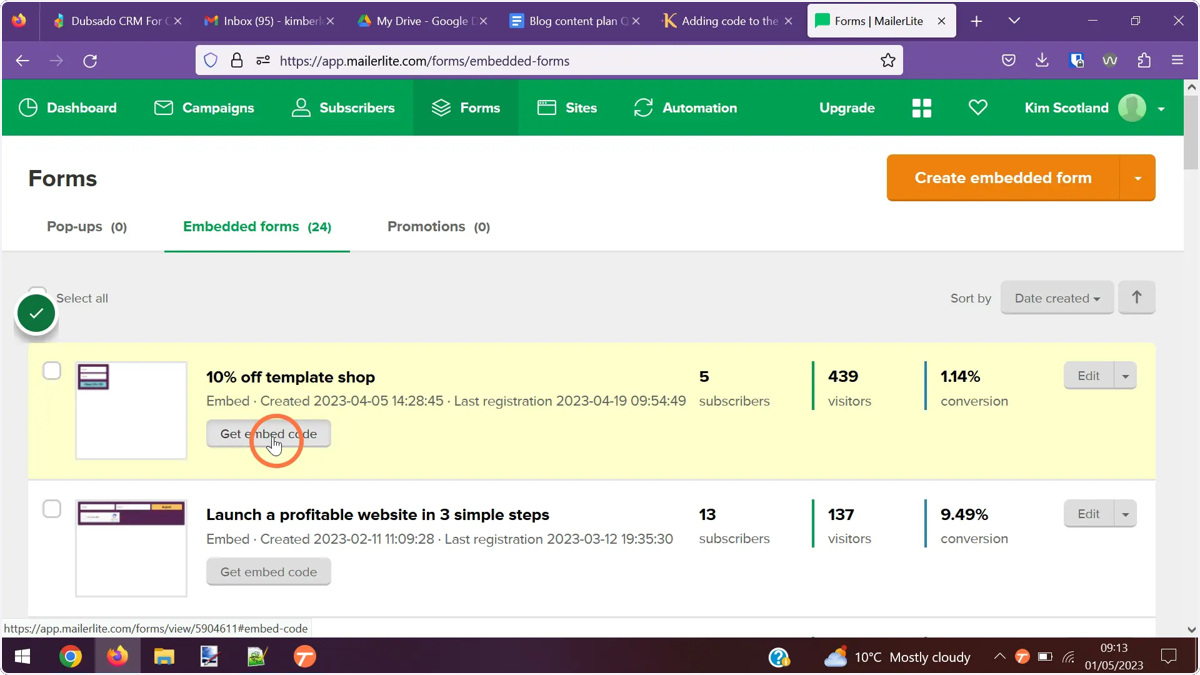
- Click on the ‘Embed code’ button for the form you want to add to your site.
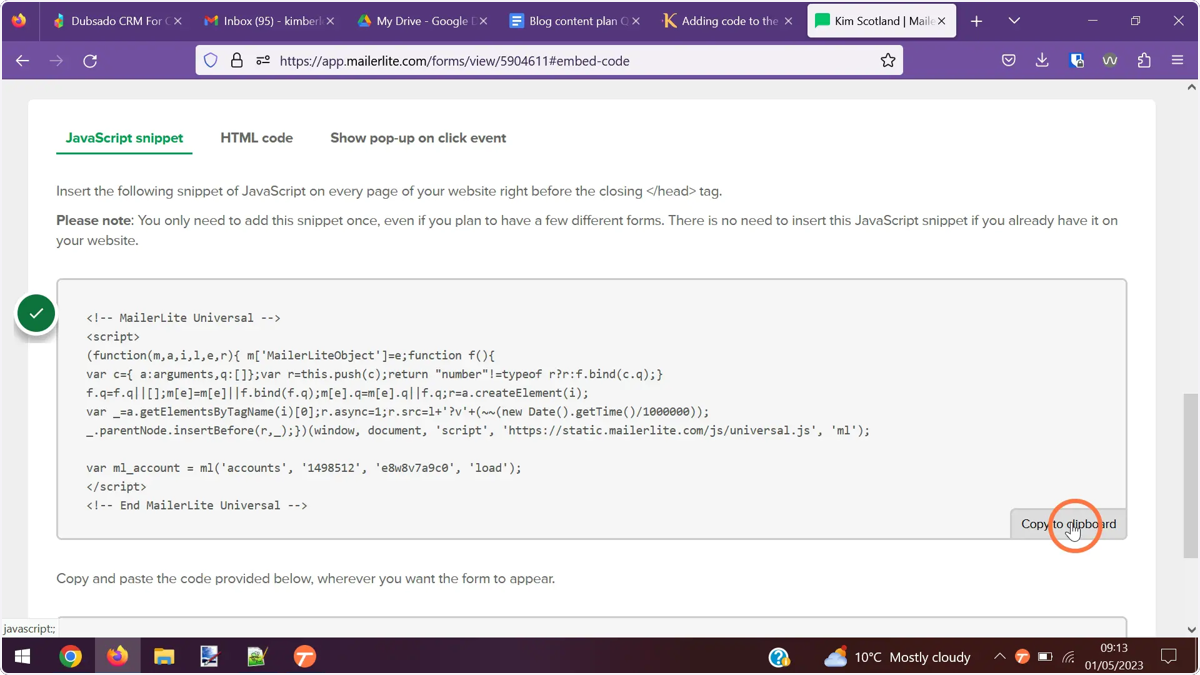
- With the ‘JavaScript snippet’ tab selected, click the ‘Copy to clipboard’ button under the first block of code.
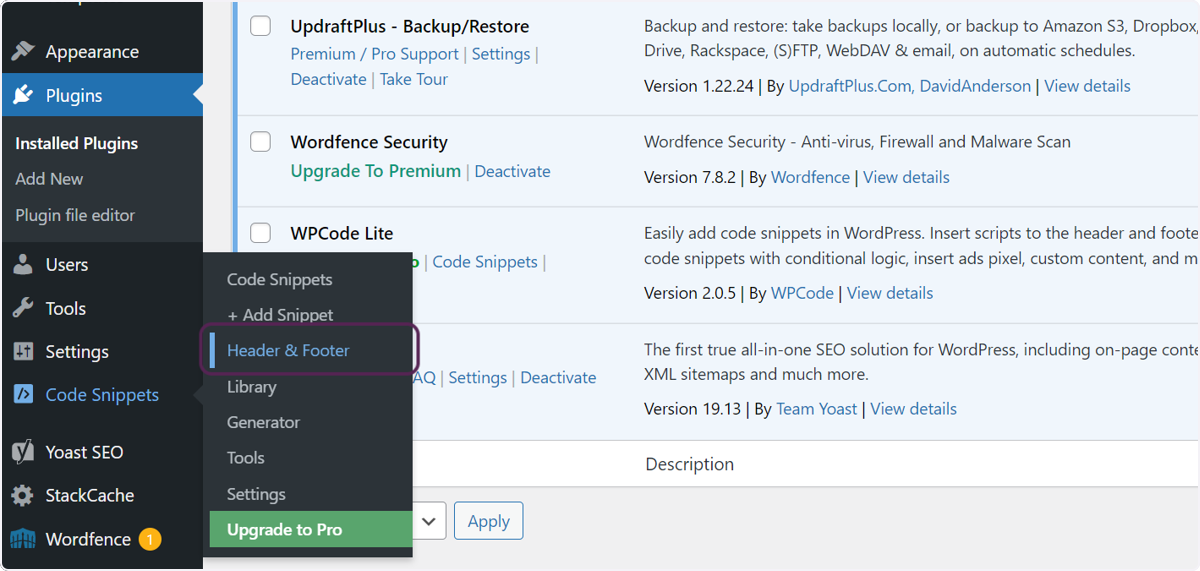
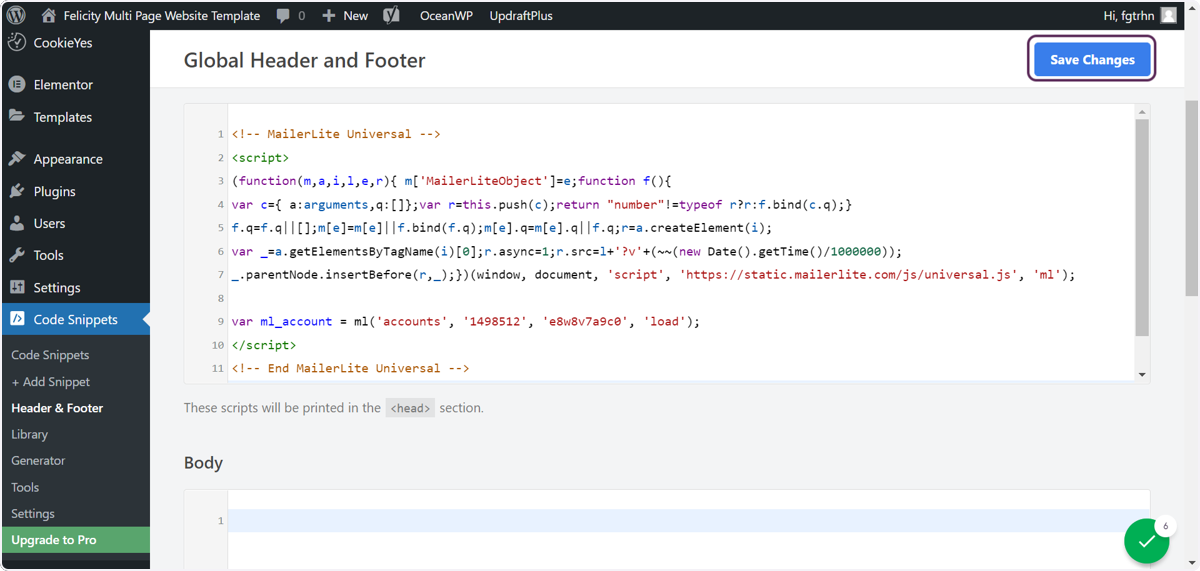
- Go back to your website. Hover over Code Snippets in the main menu then click on the Header & Footer option.
- Right click on the first text area at the top of the screen, then paste in the code you copied from MailerLite then click the Save Changes button.
Adding a form to your page
Now that you’ve added the header code, it’s time to add your form to a page.
- Open your Elementor landing page and search for the HTML element
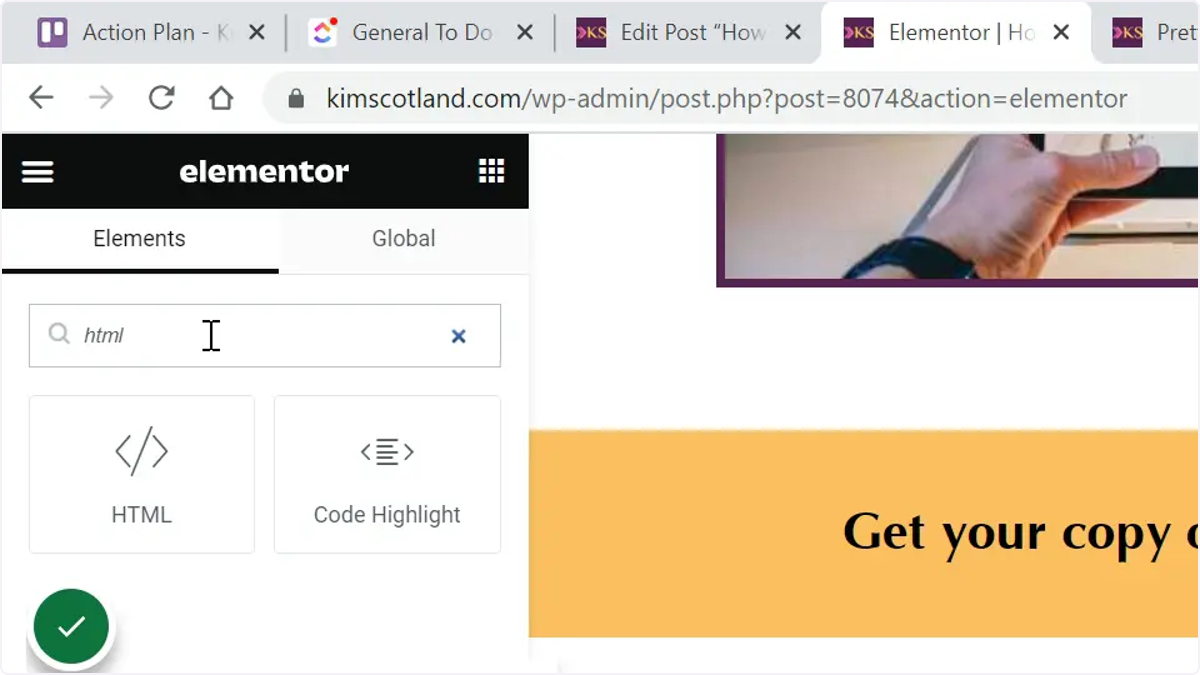
- Drag it onto the screen in the place you want it to display.
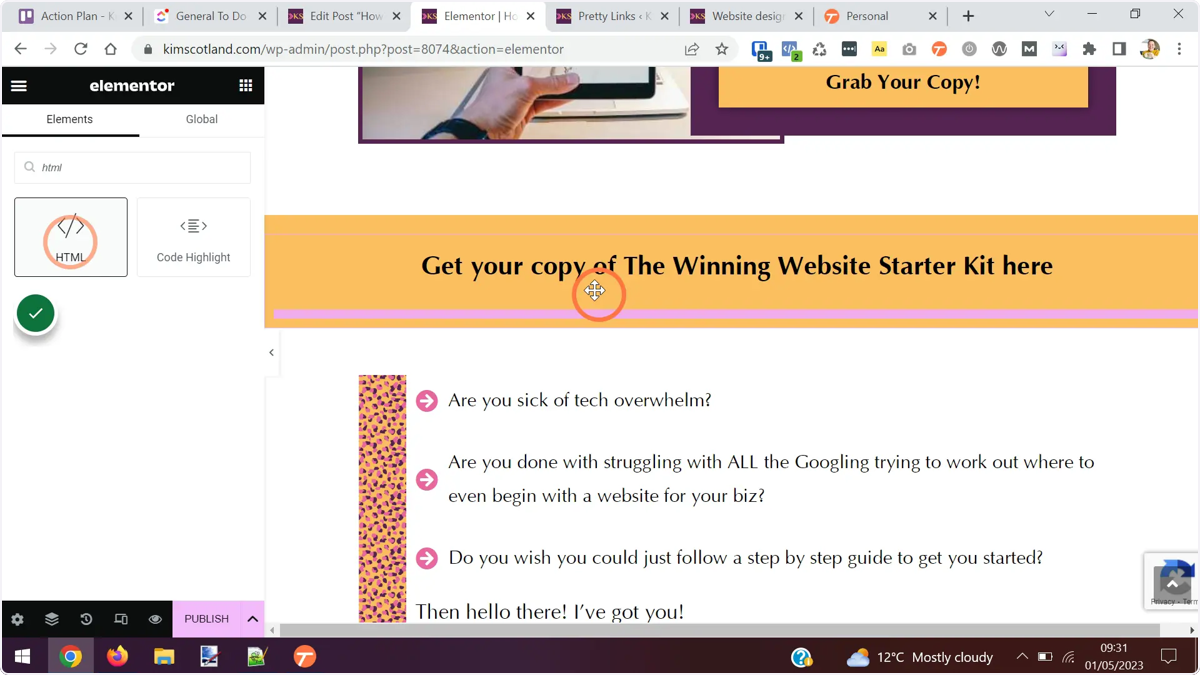
- Go back to MailerLite to get the code.
Login to MailerLite > click the Forms tab > click the Get Embed Code button for the form you want to use > scroll to the bottom of the screen.
Click the Copy to clipboard button for the form code. This is the final block of code on this screen.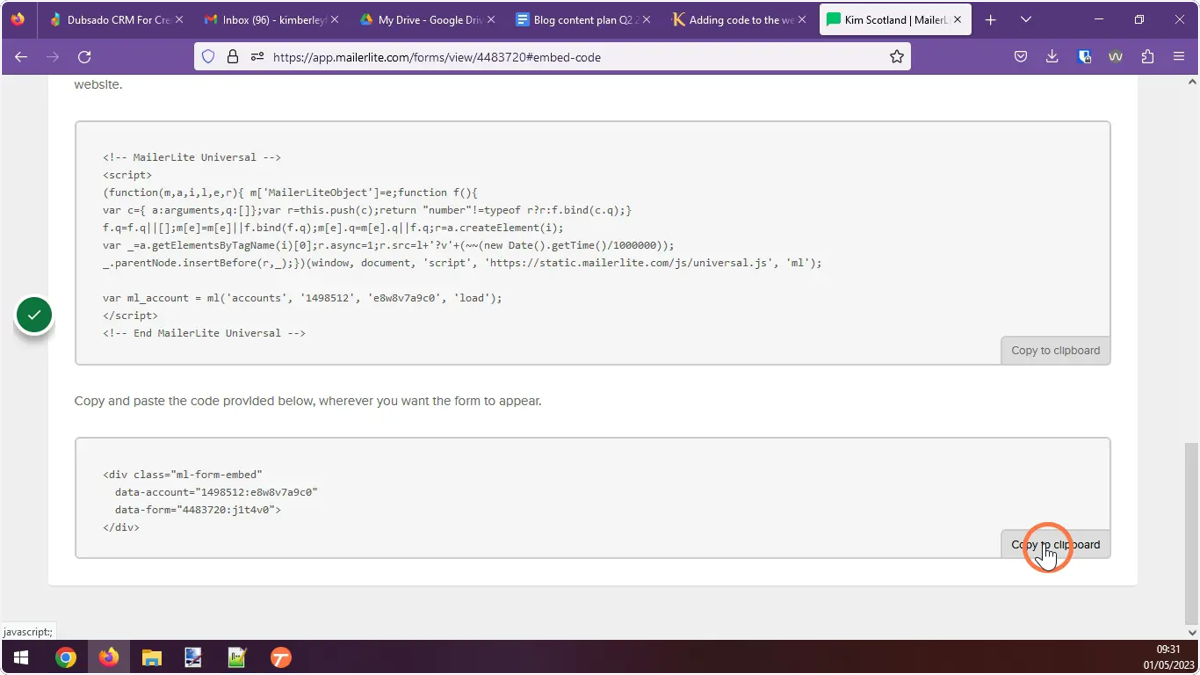
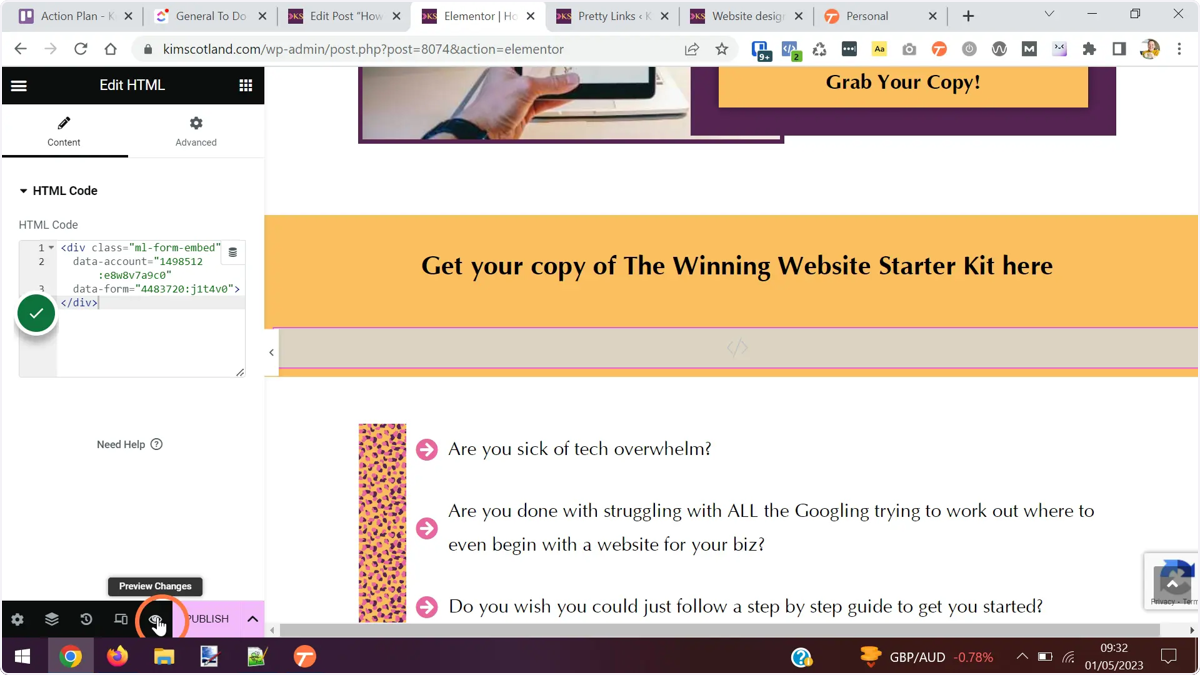
- Go back to your page on your website. If the HTML element you added earlier isn’t already selected, click it on the screen so the options appear in the options panel.
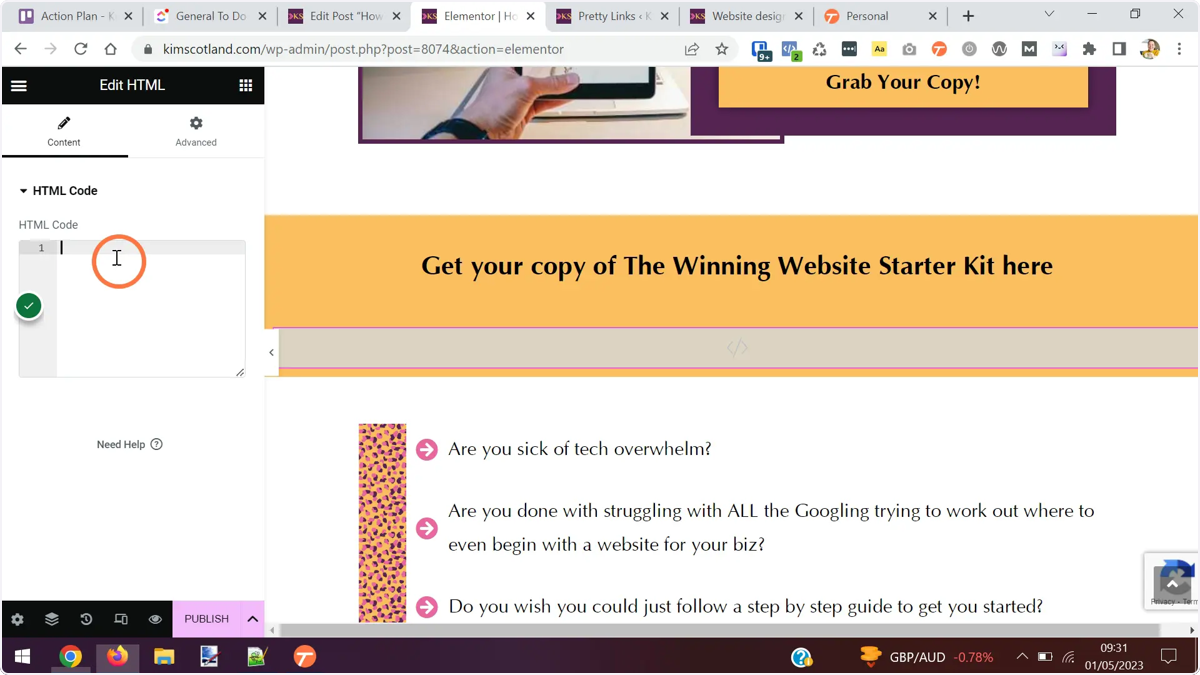
- Right click in the HTML code text area and click Paste.
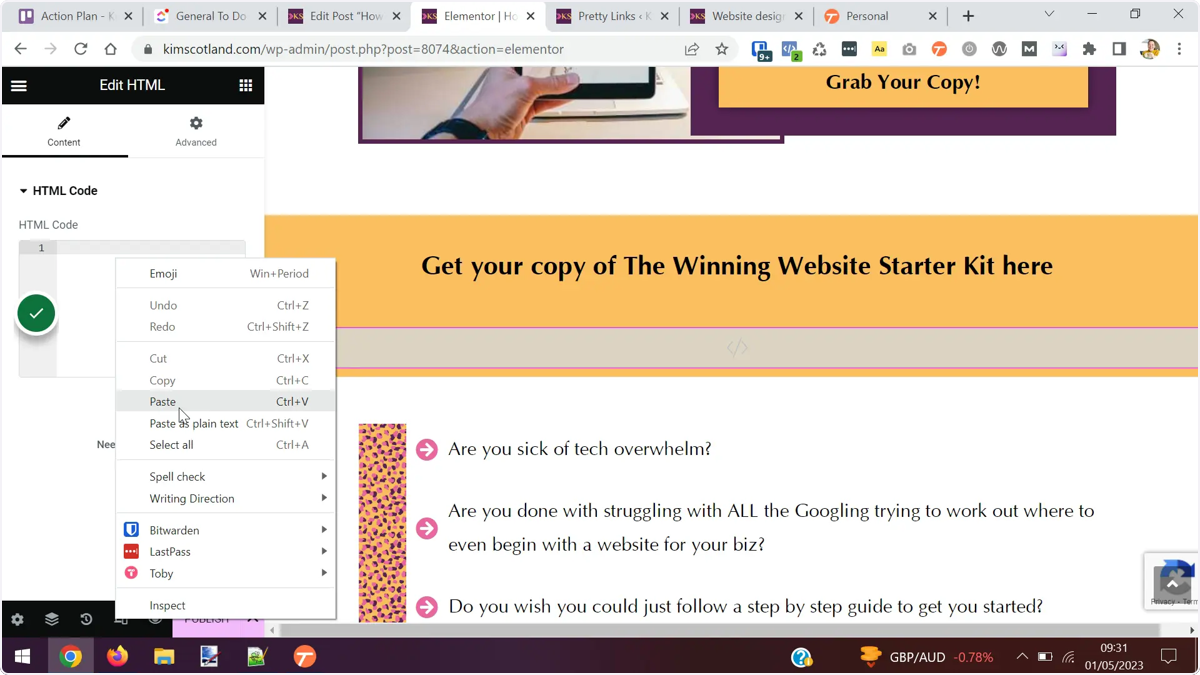
- The code you copied from MailerLite should appear.
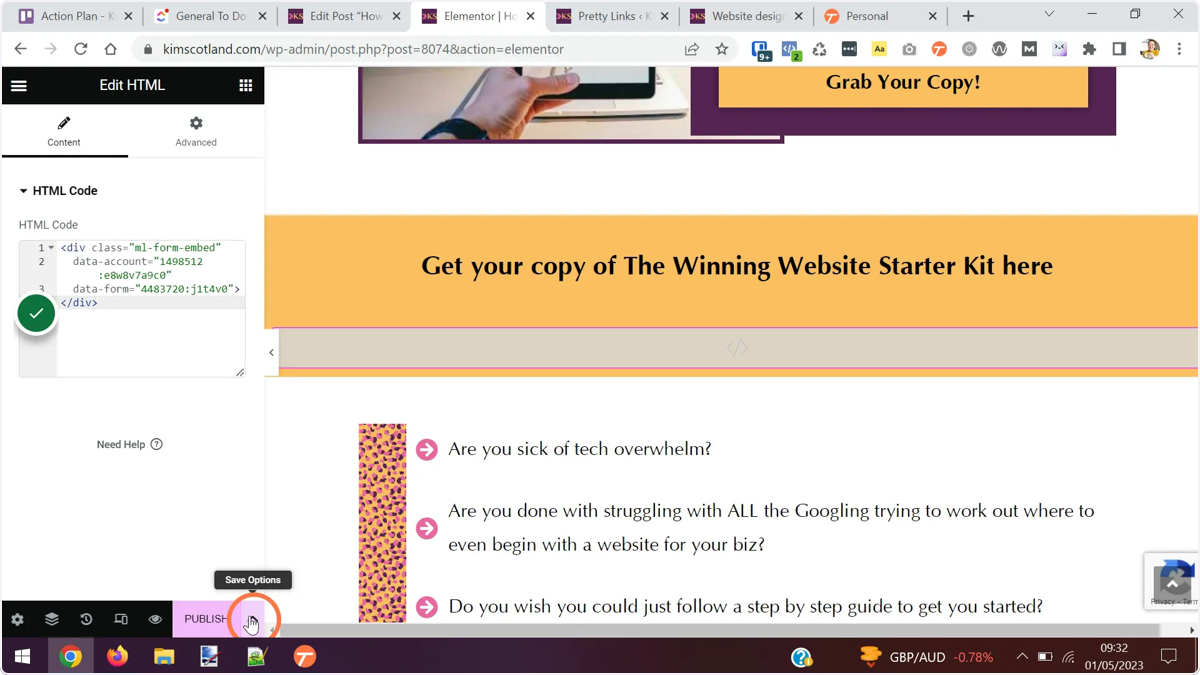
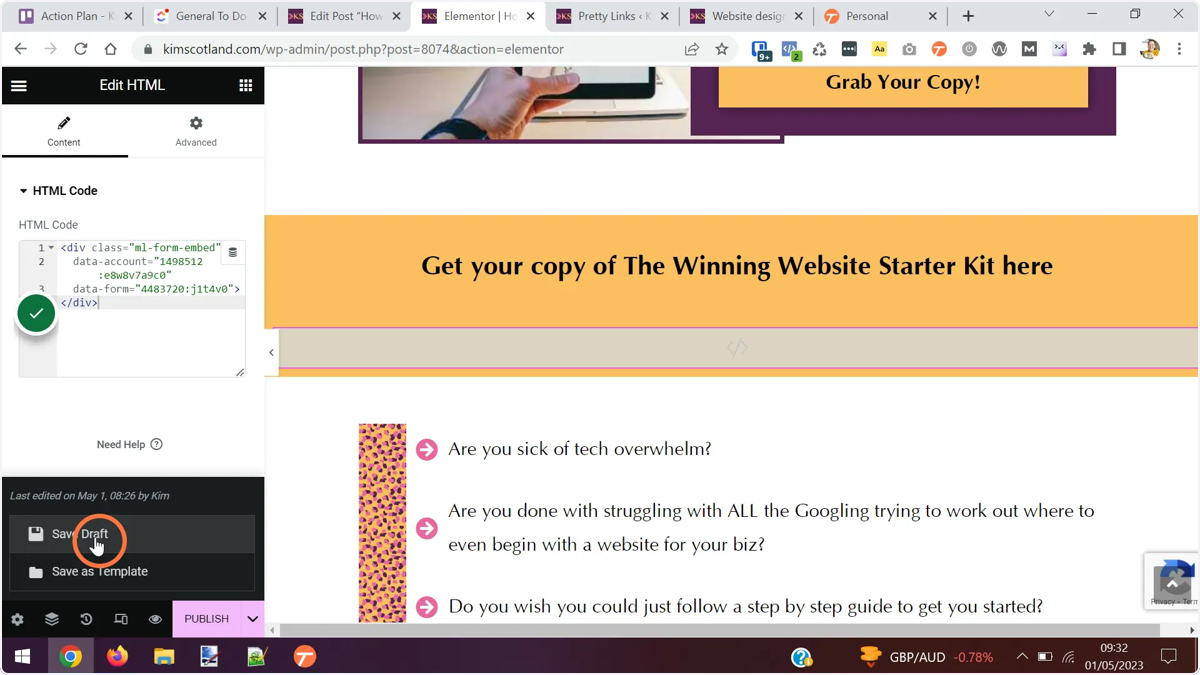
- The form won’t appear within Elementor, you’ll need to preview the page to see it, so save a draft of the page.
- Click the Preview Changes button.
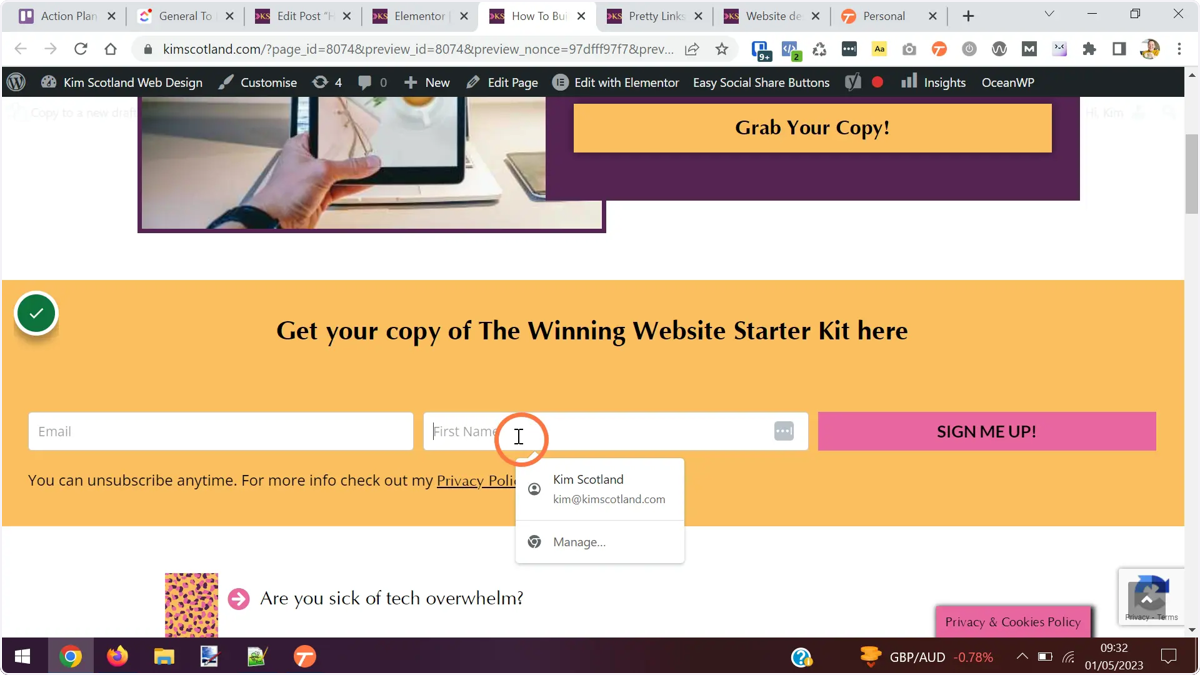
- Your page will appear in a new tab and your MailerLite form should now display on screen.
How to grow your email list with Mailerlite and Elementor: summary
- MailerLite is an email marketing platform where you can create forms to capture subscriber information.
- Elementor is a WordPress drag and drop page builder plugin which allows you to create professional websites without writing any code.
- MailerLite and Elementor can be used together in 2 ways. By copying code from MailerLite to your website or by using the official MailerLite plugin.
- Follow the steps to add a MailerLite form to Elementor via the plugin.
- Follow the steps to add a MailerLite form to Elementor via code.
You may also enjoy
How to create an email list signup form in Mailerlite
How to set up a lead magnet with MailerLite
How to create a website with Elementor
3 awesome time saving tips for using Elementor with WordPress